How to Add Custom Fields to Basecamp
If you’ve tried to add a priority level, an effort estimate, or a sprint label to a Basecamp to-do, you’ve already hit the wall: Basecamp has no custom fields. You get a name, an assignee, a due date, notes, and a checkbox. That’s it. There’s nowhere to record “this is high priority” or “this is a 3-point task” in a way you can later filter or sort on. This guide shows how to add real Basecamp custom fields, priority, status, estimate, and date, to your to-dos, cards, and messages without leaving Basecamp.
Does Basecamp have custom fields?
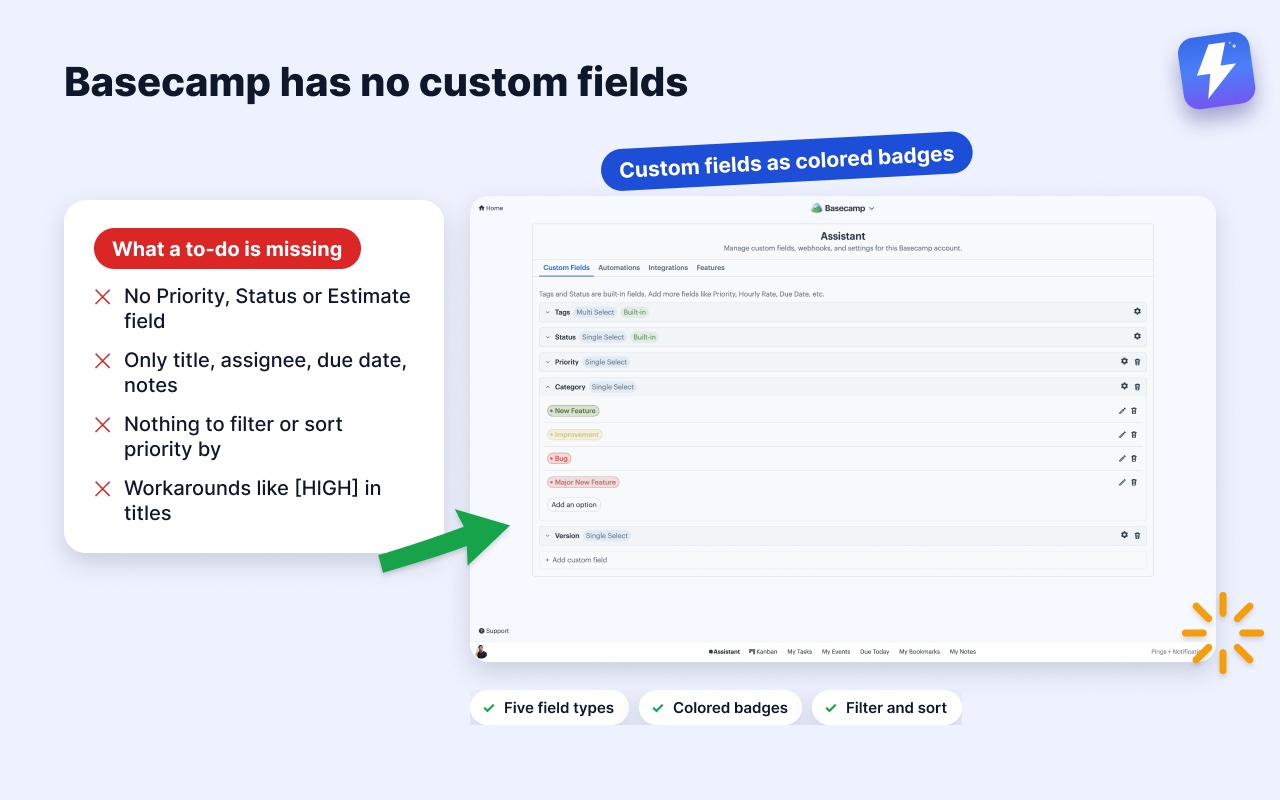
No. Basecamp deliberately keeps to-dos simple. A to-do has a title, an optional assignee, an optional due date, and a notes area. Card Tables add a few more touches, but neither to-dos nor cards let you define your own structured fields like Priority, Status, Estimate, or Client.
That’s fine until your team grows past a handful of tasks. Then you start writing “[HIGH]” in front of titles, or putting “~4h” in the notes, or keeping a separate spreadsheet of which tasks are blocked. All of those are workarounds for the same missing thing: fields you can attach to an item, see at a glance, and filter by.
How to add custom fields to Basecamp
Assistant for Basecamp is a browser extension that adds custom fields directly inside Basecamp (the full feature rundown is on the custom fields for Basecamp page). You define a field once, then apply it to to-dos, cards, and messages across the project. The values live in Basecamp alongside your work, and they show up as colored badges so you can read the state of a task without opening it.
Here’s the setup, start to finish:
- Install the extension. Add Assistant for BasecampAssistant for Basecamp from the Chrome Web Store or Firefox Add-ons. It runs on Chrome, Firefox, Edge, Brave, and any Chromium browser.
- Connect Basecamp once. Open the extension and sign in with Basecamp’s OAuth. Anyone connects the account once and everyone on that account gets the fields, there’s no per-person setup. The getting started guide walks through it.
- Open the custom fields manager. Inside any project, open Assistant’s settings and create your first field. Give it a name, pick a type, and add the options you want.
- Apply values to your items. Open a to-do, card, or message and you’ll see your fields ready to fill in. Set a value and it saves to Basecamp immediately.
What field types can you create?
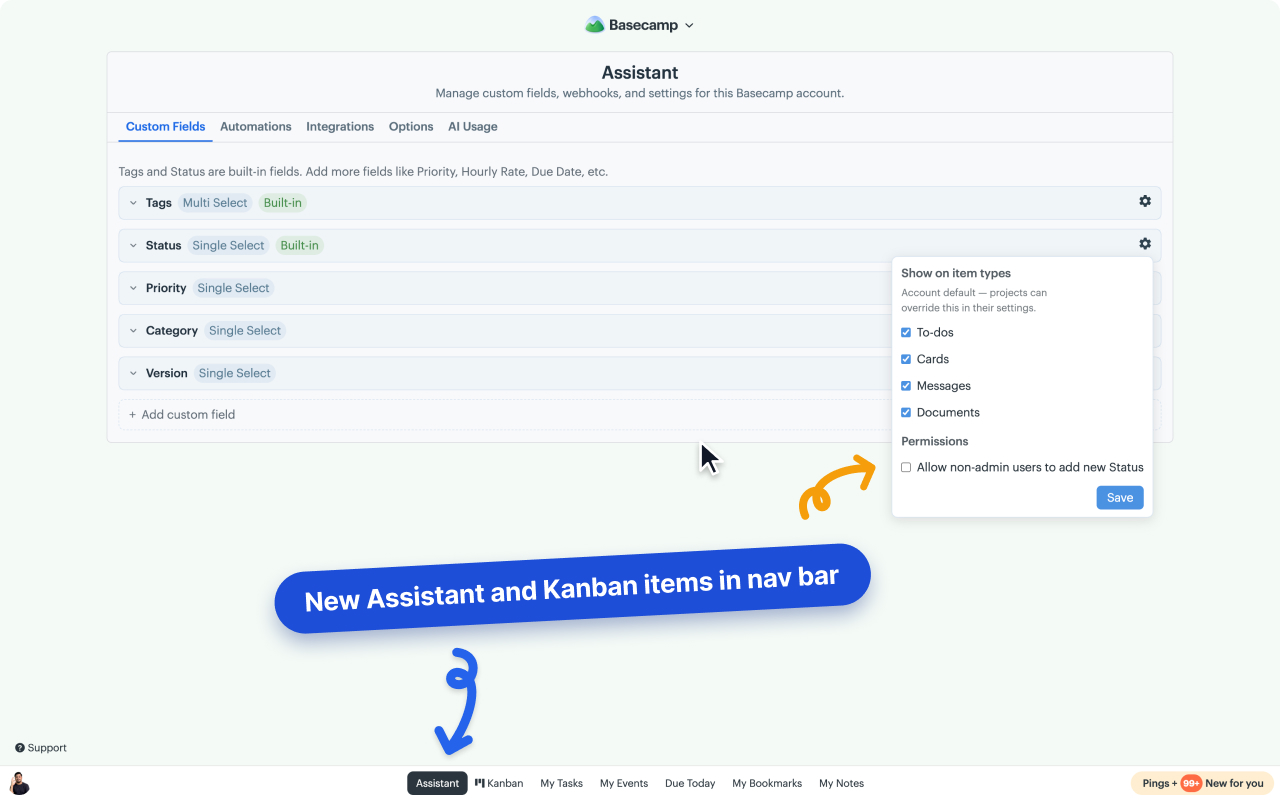
You’re not stuck with one shape of data. Assistant supports five field types, and each one fits a different job:
- Single-select: pick one option from a list. This is what you’d use for a Basecamp priority field (Low / Medium / High / Urgent) or a status field (Not started / In progress / Blocked / Done). Each option gets its own color, so a board full of red “Urgent” badges is easy to scan.
- Multi-select: pick several options at once. Good for things like Platforms (Web, iOS, Android) or Departments where a task can belong to more than one.
- Text: free-form notes you want to keep structured and visible, like a client name, a ticket reference, or a short label.
- Number: a numeric value such as a story-point estimate, an hour count, or a budget figure. Because it’s a real number, you can sort by it.
- Date: your own date field, separate from Basecamp’s built-in due date. Useful for a “design due” or “review by” date that sits next to the real deadline.
A note on the Basecamp due date field: Basecamp already has a native due date on to-dos, and Assistant respects it. The custom date type is for the extra dates a team often needs, the QA date, the go-live date, the follow-up date, not a replacement for Basecamp’s own.
Where do the custom fields show up?
Fields aren’t locked to one place. Once you define a field, you can attach values to three kinds of items:
- To-dos: the most common case. Add priority and estimate to every task in a list.
- Cards: if you use Basecamp’s Card Tables, your fields work there too.
- Messages: tag a message board post with a status or category so it doesn’t get lost in the thread.
Values render as colored badges right on the item, so anyone glancing at a list or a board can read the priority and status without clicking in. The colors come from the options you set when you create the field.
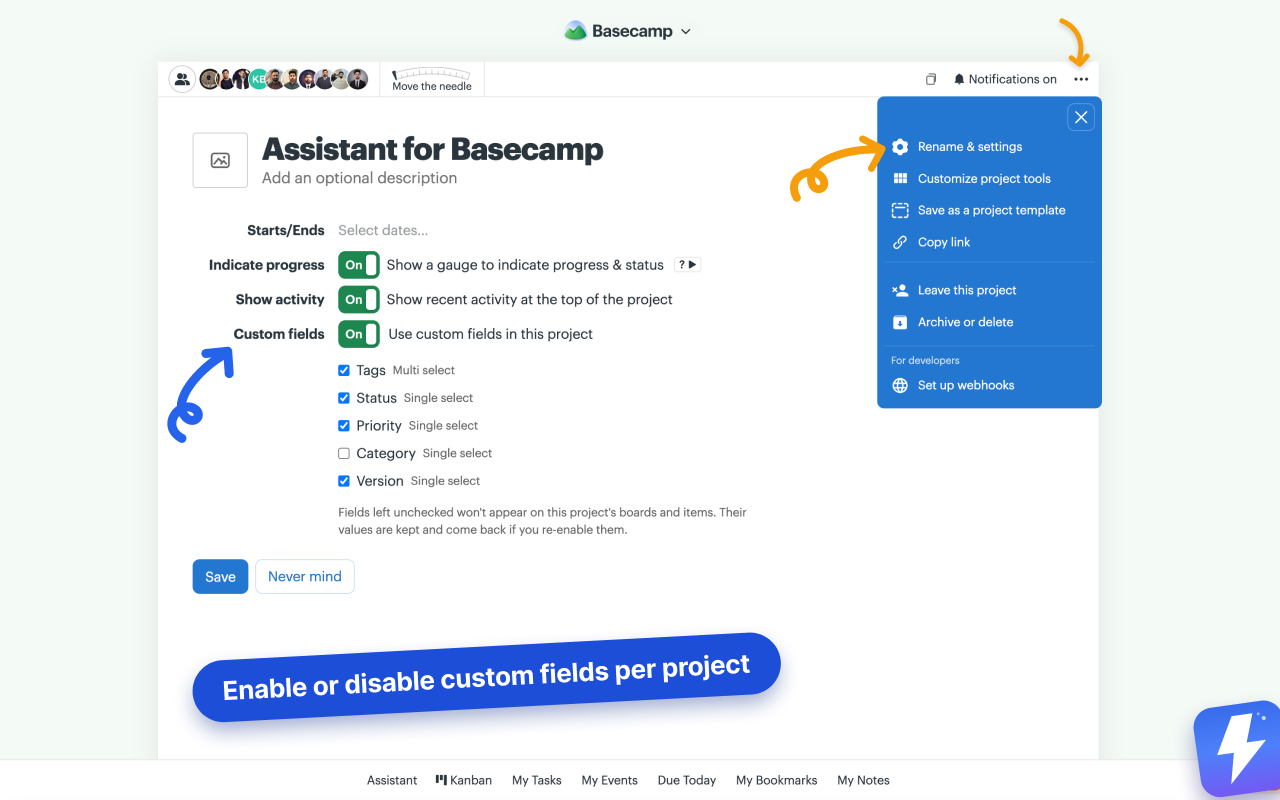
Admins also decide which fields each project uses, straight from the project’s own Rename & settings page, so a lean client project stays lean while your dev board runs Priority, Category, and Version.
Custom fields vs tags vs statuses: which do you need?
Assistant gives you three ways to label work, and they overlap a little. Here’s the honest breakdown:
- Tags are simple, free-form labels. Add as many as you want to an item (bug, frontend, q3). Reach for tags when you don’t need a fixed set of options.
- Statuses are a single, workflow-style state, In review, Blocked, Shipped. Use a status when an item is in exactly one state at a time.
- Custom fields are structured data with a defined type. Use a single-select field when you want a controlled list with colors (priority), a number field when you need to sort or total (estimate), or a date field for an extra deadline.
For a lot of teams a single-select custom field and a status feel similar. The difference is intent: a status answers “where is this in the workflow?” and a single-select field answers “what category or level is this?” You can use both, or just the one that fits.
Can you filter and sort by custom fields?
Yes, and this is where the fields earn their keep. Once tasks carry priority, status, or an estimate, you can filter and group your Basecamp tasks by those values, narrow a board to “high priority, not done,” or group a Kanban board into columns by status. A number field like estimate can be sorted so the biggest tasks float to the top.
Where Basecamp’s simplicity still wins
Custom fields are powerful, and that’s also the risk. Basecamp left them out on purpose, betting that most teams overcomplicate their tools. If your team is small and your to-do lists already tell you everything you need, adding five fields to every task is just friction you’ll resent later.
A good rule: add a field only when you’ve felt its absence twice. If you keep writing “[URGENT]” in titles, that’s the signal to add a priority field. If you don’t, don’t. Start with one or two fields and grow from there. Assistant won’t force structure on you, the fields are there when you want them and invisible when you don’t.
Does this move my data out of Basecamp?
No. Your to-dos, messages, and files stay in Basecamp, read live through Basecamp’s API. The field definitions and their values are stored on our servers, keyed to the Basecamp items they belong to, and drawn onto Basecamp in your browser. Teammates who don’t install the extension see Basecamp exactly as before. If you ever uninstall, your Basecamp work is untouched. For setup details, see the custom fields help doc.
What does it cost?
Assistant is one flat price, $29/month or $290/year for your whole team, with unlimited seats and every feature included. One admin subscribes and everyone on that Basecamp account gets custom fields, tags, statuses, and the rest, with no per-seat charge. There’s a 7-day free trial and no card needed to start. Full details are on the pricing page.
The short version
Basecamp has no native custom fields, so you’re stuck with title hacks and side spreadsheets. Add Assistant for Basecamp, create single-select fields for priority and status, a number field for estimates, and a date field for extra deadlines, then apply them to to-dos, cards, and messages. The values show as colored badges and you can filter and sort by them. Add a field only when you’ve missed it twice, and Basecamp stays as simple as it was.
Useful? Tell Google you want more of this.